
Request A Quote

Phone: 416-244-6476
Email:

    How to Choose the Best Strip Light in 2026

    In 2026, choosing the best Strip Light means matching its performance to the space, not simply picking the brightest option. A warm 2,700K glow may suit a bedroom, while a neutral 4,000K tone can make kitchen counters easier to work on. Check brightness in lumens per meter, color accuracy (CRI), and whether the light can be dimmed smoothly. Details matter. A high CRI can help food, fabrics, and paint look closer to their natural colors, but it may not matter equally in every room.

    Installation conditions deserve equal attention. Measure each run, note where the strip must turn, and check its cut marks before ordering. Confirm that the power supply matches the strip’s voltage and total wattage, with suitable capacity for the full run. For bathrooms, kitchens, or outdoor areas, compare the product’s IP rating with its exposure to moisture and dust. Check adhesive quality and heat management, too; a strip mounted inside a tight, unventilated channel may not perform as expected. Not always. Product labels can be confusing, and advertised brightness does not tell the whole story. Compare clear specifications, warranty terms, and manufacturer guidance rather than relying on photos alone. Even careful planning can miss a practical detail, such as a visible power supply or an incompatible dimmer. This guide explains how to weigh those trade-offs and choose lighting that fits your room, budget, and installation plan.
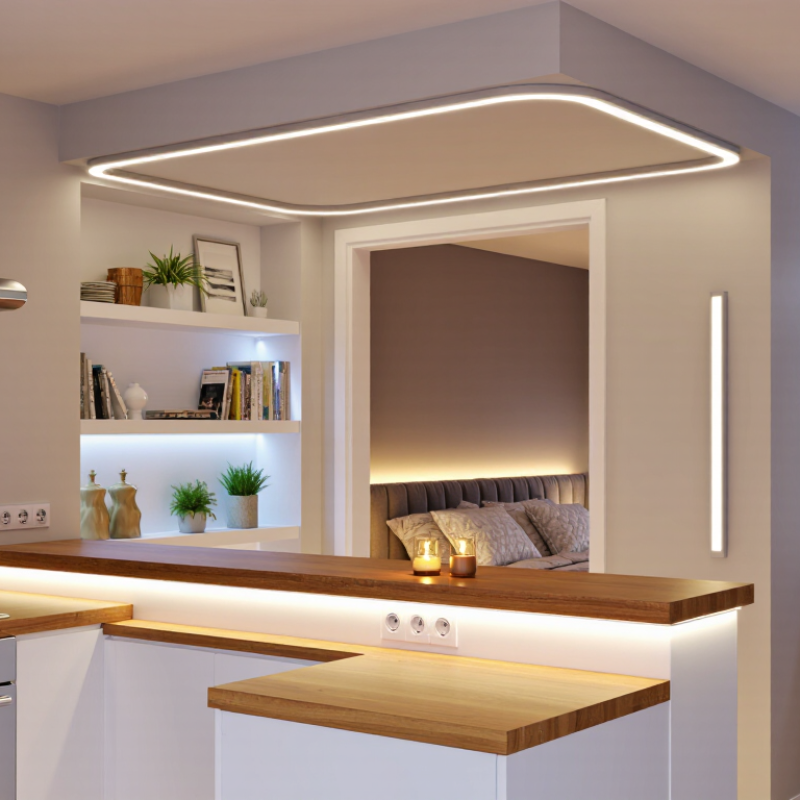
    How to Choose the Best Strip Light in 2026

    Identify the Purpose and Installation Conditions

    Start with the job the strip light needs to do. A soft glow behind a television differs from bright task lighting beneath kitchen cabinets. For reading or food preparation, check the light output and spread; a narrow strip can leave visible bright spots. Warm white often feels gentler in a bedroom, while a neutral white can make work surfaces easier to see. Test a short sample at night if the color matters. It may look different on your wall.

    Then inspect the installation area. Measure each run, note corners, and locate the nearest power source before ordering. Measure twice. Dust, grease, and textured paint can weaken adhesive, so clean and dry the surface first. Under cabinets, allow room for the power supply and avoid placing the strip where cookware can hit it. Bathrooms, outdoor areas, and other damp locations need products rated for those conditions. Check the stated rating rather than relying on a sealed-looking cover. Long runs can also appear dimmer at the far end, depending on the system and layout. I have found this easy to overlook; a quick test of the planned length can reveal uneven brightness before permanent installation.

    How to Choose the Best Strip Light in 2026

    Identify the purpose and installation conditions. These typical planning targets show how much light different applications may need.

    Higher-output strips are generally better for task lighting, while lower-output strips can suit accent and indirect lighting. Check the product’s measured lumens per foot, dimming compatibility, heat dissipation, and IP rating for the installation location. Values are approximate planning targets; actual needs vary with room size, mounting distance, and surface reflectivity.

    Compare Brightness, Color Quality, and Strip Light Types

    A strip light can look bright on a product page and still feel dim above a workbench. Check lumens per meter, not just total output, and consider how far the strip sits from the surface. A long run may also lose brightness near its far end, depending on its voltage and wiring. For a kitchen counter, even light without dark gaps is often more useful than a dramatic peak brightness. That matters. Dimming helps, but only when the strip and controller are compatible.

    Color quality changes how food, wood, and painted walls appear. Look for a published color-rendering index (CRI); a value of 90 or higher is a practical target where accurate colors matter. Color temperature also shapes the room: warm white feels softer, while cooler white can suit task areas. RGB strips offer shifting colors, but they may render everyday objects less naturally. Tunable-white strips adjust between warm and cool white, which is more useful for many daily routines. Not always.

    Strip construction matters, too. Standard surface-mounted LEDs suit general lighting, while COB strips can produce a smoother line with fewer visible dots. Both need a suitable profile or diffuser when glare is a concern. Check the strip’s cut marks, width, and heat requirements before buying; a tight corner can expose a poor fit. Specs help, but they do not reveal every room’s reflection or shadow. A small sample test can prevent an expensive guess.

    How to Choose the Best Strip Light in 2026 — Compare Brightness, Color Quality, and Strip Light Types

    Compare common LED strip light types by their typical characteristics. Actual output and color quality depend on LED density, power, optics, installation, and the specific product.

    Strip Light Type Typical Brightness Color Quality Color Options Best Suited For Key Considerations
    Single-color white (SMD) About 300–1,500 lumens per meter; output varies with LED density and power. Look for a stated CRI of 80+ for general use or 90+ for better color rendering. One fixed white color temperature, commonly 2700K–6500K. Under-cabinet lighting, shelves, coves, and straightforward task or accent lighting. Choose the color temperature before installation. Higher brightness can require more power and heat management.
    Tunable white (CCT) Often about 500–1,500 lumens per meter, depending on the strip and the selected white setting. Check CRI for the white channels; 90+ is a useful target when accurate color appearance matters. Adjustable white, often around 2700K–6500K. Rooms that need warm light in the evening and cooler white for focused tasks. Requires a compatible controller. Maximum output may vary as warm and cool LEDs are blended.
    RGB Brightness varies considerably by color and strip design; mixed colors may appear less bright than white light. RGB color mixing does not have a directly comparable white-light CRI rating. Dedicated white LEDs are preferable for quality white light. Red, green, blue, and mixed colors; some strips create white by combining RGB LEDs. Decorative accents, entertainment spaces, and colored effects. White produced by RGB mixing may look less natural than light from a dedicated white LED channel.
    RGBW Color and white output depend on the separate RGB and white LED channels. The dedicated white channel has a CRI rating; check its specification if color accuracy is important. RGB colors plus a separate white channel; white may be a fixed color temperature. Spaces that need both color effects and usable white illumination. Needs a compatible controller. Check whether the white channel is warm, cool, or otherwise specified.
    COB (continuous-looking light) Varies widely; compare the stated lumens per meter rather than relying on the COB label alone. CRI is product-specific; choose a stated CRI of 90+ when high color fidelity is desired. Available in single-color white and, depending on the design, other configurations. Visible installations where a smooth line of light is preferred. Closely packed LEDs can reduce visible spotting, but brightness, dimming, and color quality still depend on the product.
    Addressable RGB / RGBIC Varies by LED type and density; dynamic effects do not indicate a particular white-light output. Designed mainly for color effects; white-light CRI depends on whether a dedicated white channel is present. Multiple colors or effects can appear along different sections of the strip. Gaming setups, displays, and animated decorative lighting. Requires a compatible controller and power supply. Check the controllable segment length and whether the strip supports cut points.

    How to compare brightness: Use lumens per meter when available, and compare products at similar color settings. For longer runs, verify the required power supply, voltage, and voltage-drop guidance in the product specifications.

    Check Power Requirements, Controls, and Smart Features

    A strip light’s power needs depend on both its wattage per metre and its total length. Multiply the two before choosing a power supply. For example, five metres at 10 watts per metre requires 50 watts. A 60-watt supply leaves practical headroom, but check the strip’s instructions and voltage requirements. Leave room for heat and airflow.

    The U.S. Department of Energy reports that LEDs use at least 75% less energy and can last up to 25 times longer than incandescent lighting. This is a broad LED comparison, not a guarantee for every strip. Look for the strip’s stated wattage and dimming method.

    Match the controller to the strip; incompatible dimmers can cause flicker or uneven brightness. One easy-to-miss detail: long runs may show voltage drop, with the far end looking dimmer. Check the manufacturer’s maximum run length, or plan power feeds at multiple points.

    Smart controls are useful when they solve a real problem. Scheduling can switch hallway lighting off overnight, while dimming can soften a bright work surface after dark. Before buying, confirm whether control works through an app, a remote, or both, and whether it needs a hub or reliable Wi-Fi.

    Check for firmware updates and local control options, too. I would not choose a strip for a long feature list alone; setup can be fiddly, and basic controls may be enough.

    Evaluate Durability, Safety Ratings, and Compatibility

    A strip light’s lifespan depends on more than its advertised hours. Check the product’s stated operating temperature and whether it suits the room. A warm cabinet or enclosed shelf can trap heat and shorten service life. Look for a durable coating and sturdy connections, especially where the strip may be handled during installation. Small details matter.

    Read the safety markings and supporting documentation, not just the packaging headline. An IP rating describes protection against dust or water under specific conditions; it does not make every strip suitable for every damp location. Match the rating to the actual exposure, and follow the installation instructions. I would not treat one rating as a guarantee. Labels can be easy to misread, so verify the exact model and power supply.

    Compatibility is equally practical. Confirm the strip’s voltage matches its power supply, then check that the controller and dimmer support the strip type and load. A connector that looks right may still have the wrong pin spacing or polarity. Check cut marks before trimming; cutting elsewhere can damage a circuit. If the strip will run around a corner, measure the route and choose suitable connectors rather than sharply folding it. It is easy to overlook this until the lights are already mounted.

    Compare Costs and Select the Best Fit for Your Needs

    Compare the full installed cost, not just the price per metre. A strip may seem affordable until you add its power supply, dimmer, connectors, and mounting channel. Check whether these parts are included. Small details matter. For a fair comparison, estimate the total length, required brightness, and likely electricity use before shopping. A bright strip running for hours each evening can cost more over time than a lower-wattage option. Check the product’s power rating and calculate usage for your actual routine, not an imagined one.

    Then match the strip to the place and task. Under kitchen cabinets, even light and a suitable colour-rendering rating help food look natural. In a damp area, check the protection rating and follow the installation guidance. For a long run, confirm that the power supply can handle the total load; otherwise, brightness may vary along the strip. I have seen shoppers focus on the cheapest roll and overlook these practical costs. It is an easy mistake. Still, specifications can be confusing, and a higher rating does not automatically mean better value. Compare like-for-like products, include any installation help you need, and leave room in the budget for a connector or two.